
Are you a homeowner facing the daunting task of repairing or finishing drywall? It’s a common challenge that can leave even the handiest DIY enthusiast scratching their head.
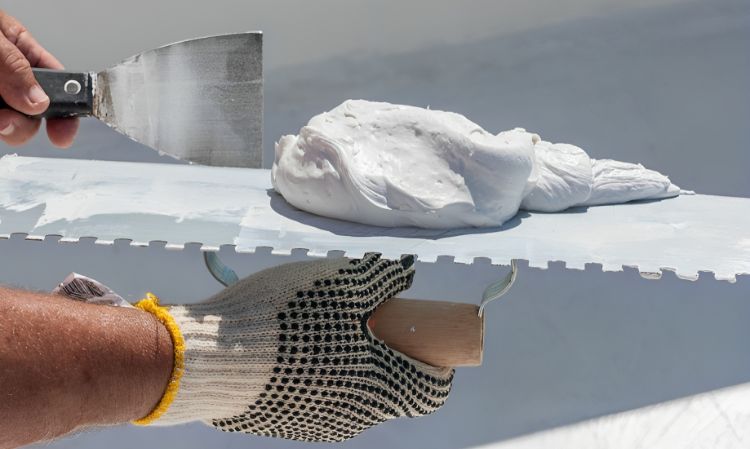
Enter the dynamic duo of drywall repair: Joint Compound and Spackle.
These two products are like the Batman and Robin of the home improvement world, each with its unique superpower.
While they may look similar at first glance, they have distinct purposes and shouldn’t be swapped willy-nilly. Choosing the wrong one can lead to a disaster worthy of a superhero showdown.
What is the main difference between Joint Compound and Spackle?

The primary distinction between Joint Compound and Spackle is their designated roles: one serves as a solution for larger surface areas. At the same time, the other excels as a finisher for smaller spots.
Although both products share gypsum powder as a base ingredient, their distinctive characteristics and incorporated additives render them better suited for specific applications.
So let’s explore the differences between Joint Compound and Spackle in detail.
What Is a Joint Compound?

Between the two products, Joint Compound is the more commonly used option, and you may also encounter it under names like drywall compound or drywall mud. It is a gypsum-based finishing material primarily employed for completing extensive sections of drywall.
Typically, when you acquire a Joint Compound, it comes in powdered form. To utilize it, you mix it with water, forming a paste. This characteristic allows for extended storage without the concern of it drying out.
The primary purpose of a Joint Compound is to fill in the significant gaps or seams between drywall sheets, especially in new installations. It effectively conceals these gaps and any exposed nails, leaving you with a smooth and polished surface.
Occasionally, it may also serve for adding texture to walls and ceilings, applied with a roller or stippled on using a brush. Due to its thickness and viscosity in comparison to standard paint, you can employ it to craft various creative designs.
In addition to the more common powdered form, you can also find pre-mixed Joint Compound, sparing you the need for water mixing and stirring. This type typically offers a more extended working time compared to the powdered variant, making it suitable for specific tasks.
Overall, Joint Compound plays an essential role in the finishing of drywall, imparting those final touches that transform ordinary drywall from a construction site appearance into a prepared surface ready for painting.
What is Spackle?
The drywall spackle compound is composed of gypsum powder and binding agents. Its consistency, resembling toothpaste, is thicker compared to joint compound (drywall mud). Sold in pre-mixed tubs, spackle comes in various grades tailored for specific uses.
Spackle is employed to repair minor wall imperfections such as dents, nail holes, and small damages. It boasts a quicker drying time than a joint compound, often within 30 minutes.
In the previous article we have covered about Comparing tow Plumbing Essentials S Trap Vs P Trap
What makes it a superior choice for this application compared to Joint Compound?
It boasts a quicker drying time and a thicker consistency, enabling it to penetrate small crevices and fissures effectively, sealing them shut. Additionally, due to its composition, it can often be applied in a single pass and is immediately ready for painting.
Spackle comes in various types, including vinyl, epoxy, acrylic, and standard Spackle, providing flexibility for different needs.
Furthermore, it tends to be easier to sand down and blend seamlessly into existing drywall, making it an excellent option for concealing imperfections when applied to previously finished surfaces.
Typically composed of a mixture of gypsum powder and binding agents like glue or resin, Spackle shares similarities with Joint Compound. It is available in both powdered form, requiring mixing with water, and pre-mixed versions that can be directly applied from the container.
This, coupled with its rapid drying time, makes it ideal for the swift completion of small tasks, often allowing for painting within just a few hours and minimizing the need for multiple applications.
In summary, lightweight Spackle is generally regarded as a go-to product for repairs and touch-ups when compared to Joint Compound, offering efficiency and convenience for smaller projects.
Differences between Joint Compound and Spackle?
Now that you have a clearer understanding of how these two products operate and their respective intended applications, let’s juxtapose their characteristics to determine which is better suited for your particular project.
Composition
Joint Compound is made from gypsum powder and water, allowing users to adjust the consistency. It’s ideal for larger seams and joints.
Spackle, on the other hand, mixes gypsum powder with adhesives, creating a thicker paste. This makes Spackle perfect for filling small holes and cracks without drips.
Drying Time
Joint Compound usually takes longer to dry than Spackle, with a drying time of 24 to 48 hours depending on factors like humidity and thickness.
In contrast, Spackle dries much faster, often within 30 minutes for small repairs, though drying time can still vary based on environmental conditions and application thickness.
Consistency
Joint Compound’s creamier texture is ideal for larger surfaces, minimizing the need for excess sanding and offering strong adhesion.
In contrast, Spackle’s thicker consistency excels at filling small holes and cracks efficiently while providing durability against damage over time.
Here are some mesmerizing Caulk vs. Spackle: Choosing the Right Solution
Intended Usage
Joint Compound is ideal for large projects like drywall finishing and ceiling refinishing due to its smoother consistency, reducing the need for extensive sanding.
In contrast, Spackle’s thicker texture is better suited for minor repairs such as filling cracks, covering nail holes, and adding finishing touches like wall texturing or baseboard trim work.
Bonding Strength
Joint Compound excels in bonding strength, designed for larger surfaces that endure more stress, ensuring a robust and durable finish. Its engineered resilience withstands factors like material expansion, and humidity fluctuations, making it ideal for long-lasting finishes.
In contrast, Spackle prioritizes a smooth finish, quick drying, and easy sanding but lacks the bonding power of Joint Compound, making it better suited for minor repairs and touch-ups.
Shrinkage Factor
Joint Compound, due to its higher water content and lack of binding resins, tends to shrink more noticeably. Achieving a flawless finish often requires multiple layers.
Conversely, Spackle has a lower shrinkage risk, thanks to its thicker consistency and less water content. It effectively fills cracks and small holes without the need for additional applications.
Sanding Ease
Joint Compound, thin and needing multiple layers, yields a smooth finish but can crack if not applied correctly, reducing its suitability for sanding.
In contrast, Spackle, with its thicker consistency and binding agents, is excellent for sanding. You can generously apply and easily sand Spackle for a flawless finish.
Cost
Cost can be a concern, with Spackle generally pricier than Joint Compound due to factors like brand and tub size. Joint Compound is available in larger volumes, suited for larger projects, while Spackle is designed for smaller repairs and sold in smaller quantities.
But it’s essential to avoid substituting Spackle for Joint Compound in repairs, as Joint Compound is more effective due to its ease of sanding and superior gap-filling properties resulting from its consistency.
Read More: Moen vs Delta: Comparing Two Plumbing Giants
Joint Compound vs. Spackle: Are They Equivalent?
While both products incorporate gypsum powder, they possess distinctive characteristics and additives that render them more suitable for specific applications. In summary, Joint Compound excels in larger drywall installation tasks, particularly for filling seams, while Spackle shines in smaller repair projects.
Conclusion
In conclusion, the choice between joint compound and spackle depends on the specific needs of your project. With its versatile applications and strong bond, the joint compound is ideal for larger drywall projects but requires more time and skill to achieve a seamless finish.
On the other hand, spackle is perfect for quick touch-ups and minor repairs, thanks to its easy application and short drying time. Both materials have strengths and weaknesses, and understanding their distinctions will empower you to choose the right tool for your DIY endeavours confidently.
Remember to follow expert tips for optimal results, such as layering, sanding, feathering edges, and allowing proper drying time. Whether aiming for flawless walls or minor repairs, knowing the differences between joint compound and spackle will lead you to achieve professional-looking results.
Read Next: Neutral Bar vs. Ground Bar: Electrical Differences You Should Know